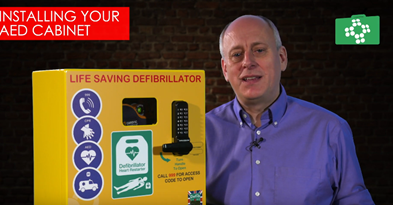
What we are going to do now is take a look at installing your AED cabinet. To begin installing your AED cabinet, measure from the floor up and choose your desired height, which should between 1 and 1.35 metres from the bottom of the cabinet. Drill your first hole and insert the wall plug and temporarily insert a bolt into the top right-hand hole. Tighten slightly to help support the weight of the cabinet while you then mark out the other holes. Place your Spirit level on the top of the cabinet and move it until it is perfectly level, and then mark the other three drilling positions through the holes in the back of the cabinet. Remove the first bolt from the cabinet, and take the cabinet down, carefully placing it on the floor.
Carrying on
The next step is to drill the remaining three holes. These need to go into a depth long enough to take the entire bolt included in the fixing pack. For the next part, you will need somebody to help you. After you have drilled and cleaned all of the four holes, insert the wall plugs tapping them in gently with a hammer until they are flush with the wall.
You will then need an assistant to hold the cabinet and offer it to the holes you have drilled. Take your bolts and insert them first through the steel washer, and then through the small nylon washer, and put them through the holes in the back of the cabinet and then into the wall plugs that are in a place where you have previously drilled your holes. We recommend the use of large spaces if you are mounting your cabinet on an uneven surface.
Once all four bolts are in place you can begin to tighten them. Do not tighten any bolt all the way. Go around in a clockwise motion doing four or five turns in each bolt until the cabinet is securely fastened to the wall. Do not over tighten these bolts as this can bend the cabinet out of shape and cause problems when closing the door.
After you have drilled and plugged the four holes, you will need to decide where your electrical supply is going to enter the cabinet. Although the unit comes fitted with the plug, we do recommend it is hardwired. The entry point for the electrical supply is guided through the gland at the bottom of the cabinet. On no account are you to drill further holes in the cabinet to try to allow easier access for electricity. This will void the warranty and also lead to water ingress.
After installing your AED cabinet
After installing your AED cabinet and connecting it to the electrical supply, tighten the gland at the bottom. This produces a watertight seal around the cable. When the power supply is connected, the heater will not automatically turn on unless the temperature drops below eight degrees, and is something which has been tested in the factory before dispatch. If your cabinet comes with a magnetic light, insert the batteries. Then connect the magnetic light to the inner front of the cabinet. This light is motion-sensored meaning it will turn on when the door is opened.
Once the cabinet is operational, for the first four weeks, the door will often be stiff to open and close. This is due to the silicone gasket on the inside of the door which requires a bedding-in period. During this period, you may have to push quite firmly on the door to get it locked. However, do not slam the door.
ProTrainings have a free video online course on installing an AED cabinet.
For more information on training courses, visit our “Courses” page which also includes our First Responder and First Person on Scene (FPOS) Courses.

